Online Remote Testing with No Appointment Needed
New! Available now for initial G1 ASE Certification and Recertification
Coming soon for Collision Tests (B-Series)
Technical Requirements
Your equipment must meet the following requirements
Testing Environment Requirements
What's Allowed and Not Allowed
Remote Testing Rules
Important Information to Remember
The proctor is required to notify ASE if any rules are violated during the test.
Disclaimers:
- If improper activities occur, we reserve the right to take appropriate actions as necessary, including invalidating your test results and pursuing legal remedies if warranted.
- By participating in the testing process, you acknowledge and waive any privacy rights at the testing location.
- If you do not consent to being recorded via video and audio, notify the proctor immediately and discontinue your test.
- Confidentiality of Intellectual Property: All ASE test content, including but not limited to questions, answers, images, diagrams, and related materials, is the exclusive property of ASE and constitutes confidential and proprietary information protected by copyright, trade secret, and other intellectual property laws. By taking the ASE test, you acknowledge that you acquire no ownership, license, or other rights in any test content. Unauthorized use, reproduction, or disclosure of test content may result in civil liability and criminal prosecution.
Getting Started
Steps to Begin ASE Flex Testing
-
Run a System Check
Confirm your internet download and upload speeds by running a system check. For best results, use a broadband connection with a broadband/cable download speed of 15 Mbps or higher and an upload speed of 3 Mbps or higher.
-
Have Your Valid ID Ready
Get your drivers license (or a valid, unexpired government-issued photo ID) ready to show the screen.
-
Open the Program
Download and open the Remote Proctor Connect Application onto the computer you will be testing on.
-
Scan QR Code
A QR code will be displayed on your computer. Using your smartphone/tablet, scan the code on your computer to connect your smartphone/tablet to monitor you while you take your test on your computer. Be sure your smartphone/tablet is charged and remains plugged in throughout the testing session so it doesn’t die in the middle of your test, resulting in the test to end.
-
Allow Camera Access
Allow access to your camera when prompted and complete the connection process. Once connected, your smartphone/tablet will be locked down and remain active as a second camera for the duration of your test.
-
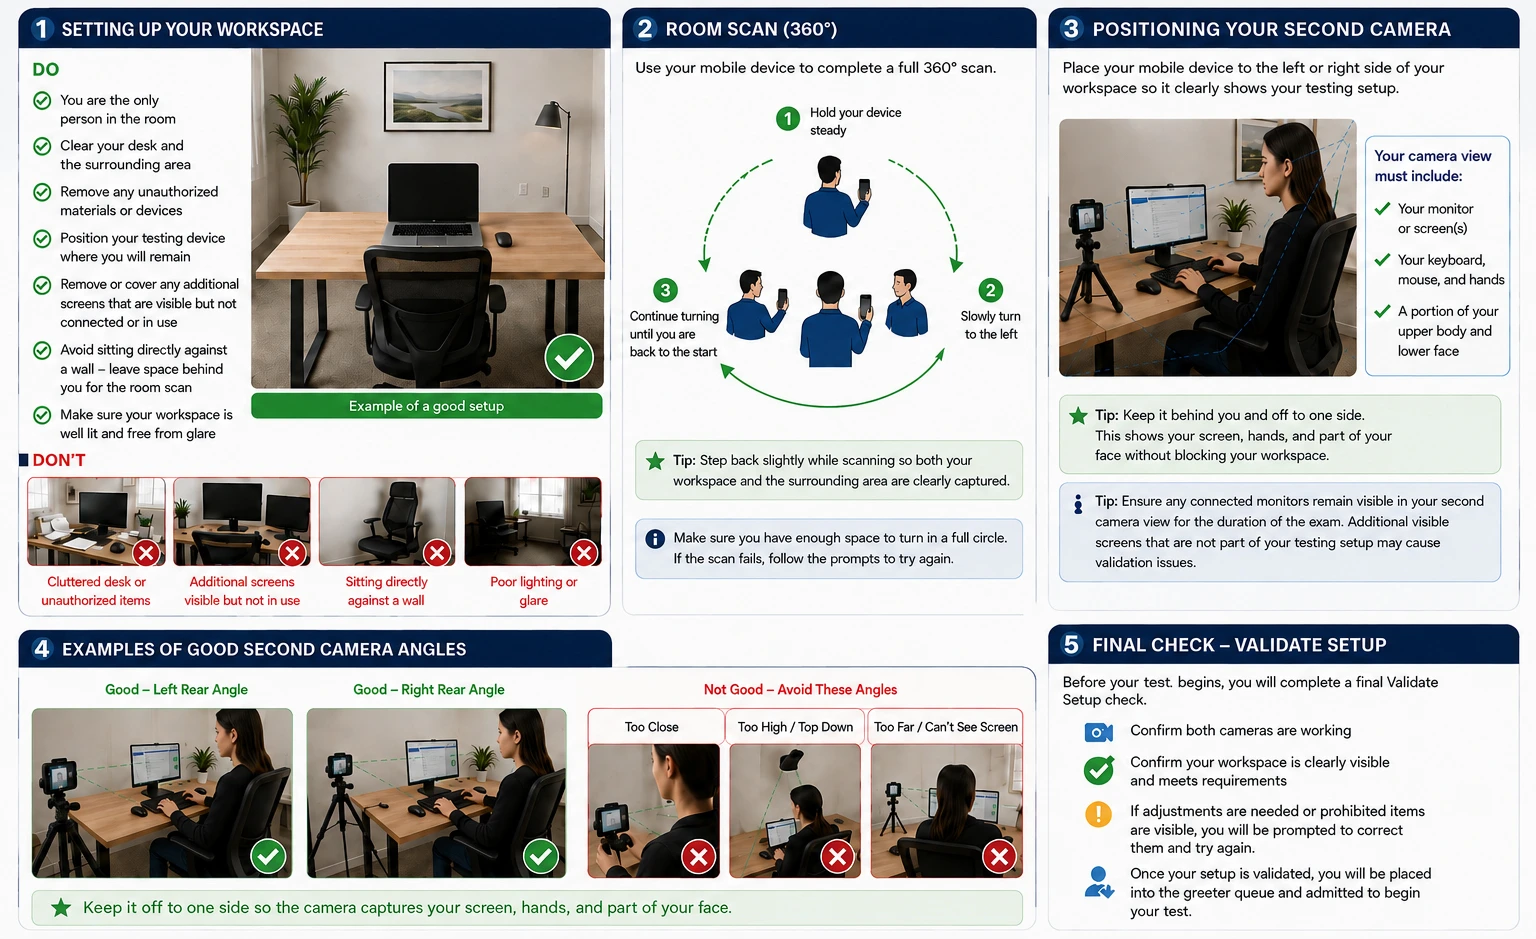
Scan the Room
You will use your smartphone/tablet to complete the required room scan. You will be asked to slowly turn your device in a full circle to capture your testing environment. (If the room scan doesn’t work the first time, follow the prompts and try again. A green banner will be displayed when the room scan is successful.)
-
Get Your Camera Ready
Once the room scan is complete, position your phone/tablet to the side of your computer so it can clearly see you and your computer at all times.
-
You're Ready to Test!
Now you will be placed into the greeter queue and granted access to begin your test once your setup is validated.
Prepare your Environment for a Remote-Proctored Test
Use the guidelines below to set up your workspace and cameras for a smooth check-in.